Basic usage of ComfyUI Image to image section

In this article, we would like to explain Image to image (img2img) used in ComfyUI and introduce a workflow similar to img2img/inpainting/sketch mode in A1111 WebUI.
Image2image

Let’s start with the official Img2Img Examples.
Download the workflow image from the linked page and drag and drop it into ComfyUI or load it from the Load button.
When loading is complete, load the model of your choice from ckpt_name in the “Load Checkpoint” node.
The difference from ConfyUI’s Text2image is that instead of “Empty Latent Image”, “Load Image” and “VAE Encode” nodes are used to load the input image. In this workflow, the size of the input image is used as the latent space, so input an image that is within the acceptable size of the model.
Example of generation size for each model- SD1.5: 512×512 or 768×512
- SDXL: 1 mega pixel: 1024×1024 or 1216×832 etc.
Next, let’s look at “KSampler”. At the bottom of the parameters is a parameter called denoise. This parameter determines how much of the input image elements will be retained. A value of 0.0 means that the input image will be output as is, while a value of 1.0 means that almost no elements of the input image will remain. Experiment with different values for denoise.
Improve the official Img2Img Examples
From here, we will try to improve the official Img2Img Examples into a more practical img2img workflow. Here is a list of what we want to implement.
- Implement a scaler to match the input image to the corresponding scale of the model.
- Implement custom nodes “ComfyUI WD 1.4 Tagger” and “ComfyUI-Custom-Scripts” because we want to analyze prompts from input images.
- Adapt Clip skip.
- Adapt LoRA.
- Implemented “EasyNegative” negative embedding to improve quality.
- An “Image chooser” custom node will be implemented to streamline the workflow flow.
- Implement a second pass because the quality of generation is not good.
- Use Tiled decoding to save memory.
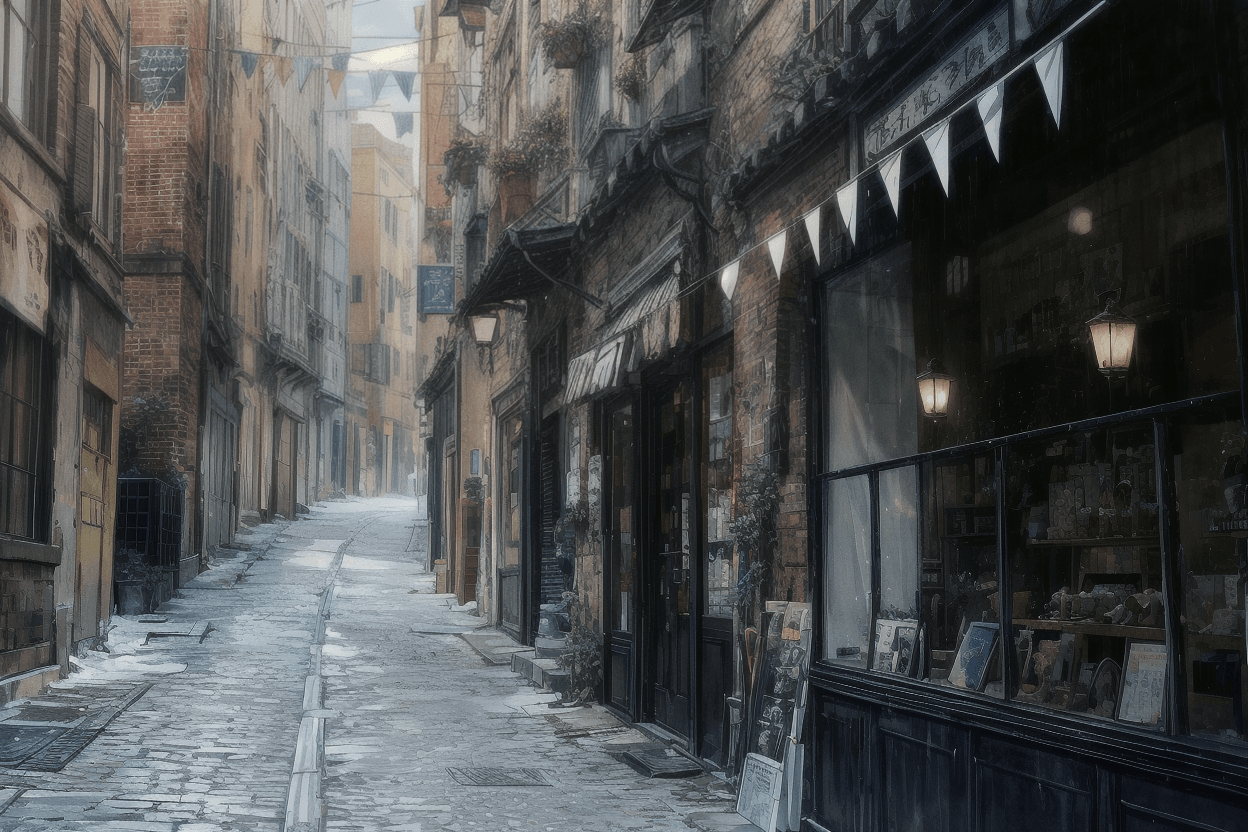
Implement the above items and customize the workflow to generate illustrations from photographs.
Installing Custom Nodes:
”ComfyUI WD 1.4 Tagger”, “ComfyUI-Custom-Scripts“ and “Image chooser” are custom nodes and must be installed first. The installation method uses ComfyUI Manager. Please refer to another article for details.
![Featured image of [AI Illustration] Introduction of Recommended Custom Nodes for ComfyUI](/_next/image?url=https%3A%2F%2Fdca.data-hub-center.com%2Fcontent%2Fuploads%2F2024%2F08%2Feye_catch_comfyui-recommended-custom-nodes_en.jpg&w=750&q=80)
”ComfyUI WD 1.4 Tagger” is not introduced, but search for ComfyUI-WD14-Tagger in the Custom Nodes Manager of ComfyUI Manager and install the node whose Author is pythongos… ( pythongosssss), please install the node.
Adjustment of input image:

Add “Upscale Image” and “RepeatImageBatch” between “Load Image” and “VAE Encode”. The “Upscale Image” resizes the input so that it can be used even if it is outside the acceptable range of the model.
The “RepeatImageBatch” is a node for the “Preview Chooser” to be introduced later, which outputs a specified number of low-quality images in a single run.
- Upscale Image: image > upscaling > Upscale Image
- RepeatImageBatch: image > batch > RepeatImageBatch
Analysis of input image:

After installing “WD14 Tagger 🐍”, connect the IMAGE out of “Load Image” to the input. Change the trailing_comma to true since another tag will be connected to the parsed tag in a later step.
To connect the STRING out of “WD14 Tagger 🐍” to the text_b of “String Function 🐍”, right click on “String Function 🐍” and externalize it from the menu by Convert Widget Input > Convert text_b to input Externalize it. After externalizing, connect the STRING out of “WD14 Tagger 🐍”.
In “String Function 🐍”, enter (anime style:1.5), in text_a and masterpiece, ultra detailed in text_c. This will connect to the parsing prompt and result in a positive prompt.
Externalize with Convert text to input from the right-click menu of “CLIP Text Encode (Prompt)” where the positive prompt is written, and connect the STRING out of “String Function 🐍”.
We want to see the completed prompt, so we connect the STRING out of “String Function 🐍” to “Show Text 🐍”.
- WD14 Tagger 🐍: image > WD14 Tagger 🐍
- String Function 🐍: utils > String Function 🐍
- Show Text 🐍: utils > Show Text 🐍
Clip skip / LoRA adaptation:

Connect “CLIP Set Last Layer” to the CLIP out of “Load Checkpoint” and also connect “Load LoRA” to the CLIP out of “CLIP Set Last Layer”. The CLIP out of “Load LoRA” should be connected to the two “CLIP Text Encode (Prompt)”. And the MODEL out of “Load Checkpoint” should be connected to “Load LoRA” and from there to “KSampler”.
- CLIP Set Last Layer: conditioning > CLIP Set Last Layer
- Load LoRA: loaders > Load LoRA
Sharing Seed:

Externalize the seed value by right-clicking on the KSampler node and selecting “Convert seed to input”. Drag the seed input ● to bring up a list of nodes that can be selected, and select “Primitive“.
- Primitive: utils > Primitive
Implementation of “Image chooser”:

Replace the “Preview Chooser” node with the “Save Image” node. Leave the “Save Image” node as it will be used at the end. We also need to connect the “PlaySound 🐍” node because we want a sound notification when this node is executed.
- Preview Chooser: Image chooser > Preview Chooser
- PlaySound 🐍: utils > PlaySound 🐍
Upscaling with Model:

Connect the images out of “Preview Chooser” to “Upscale Image (using Model)”. Connect UPSCALE_MODEL out of “Load Upscale Model” to “Upscale Image (using Model)”.
- Upscale Image (using Model): image > upscaling > Upscale Image (using Model)
- Load Upscale Model: loaders > Load Upscale Model
Resize the upscaled image to the desired size:

Connect IMAGE out of “Upscale Image (using Model)” to “ImageScaleToTotalPixels”.
- ImageScaleToTotalPixels: image > upscaling > ImageScaleToTotalPixels
Implementation of a second path:

To convert a sized image to a latent image, use “VAE Encode” to convert the image.
The first KSampler is made selected and copied with Ctrl + c. Then Ctrl + Shift + v allows you to copy with the input inherited, so bring it to the desired position while keeping it connected.
Once the position is determined, the latent converted by “VAE Encode” as described earlier is connected to the latent_image input of the second KSampler.
- VAE Encode: latent > VAE Encode
- KSampler: sampling > KSampler
Use Tiled Decode to save memory:

Connect the second KSampler’s LATENT out to “VAE Decode (Tiled)” Connect the vae input to “Load Checkpoint”, which is a bit far away.
- VAE Decode (Tiled): _for_testing > VAE Decode (Tiled)
Save Image:
Finally, connect the IMAGE out of “VAE Decode (Tiled)” to the “Save Image” that you left earlier.
This completes the implementation. We will then enter the parameters as we explain how to use it.
How to Use Custom Img2Img Examples
Checkpoint Model Selection:

Specify the model with ckpt_name in “Load Checkpoint”. This time, we will use the SD1.5 model darkSushiMixMix_225D, as is customary in DCAI. You can use any model you like, but you need to adjust the parameters for the model a little.
Clip skip settings:

Set stop_at_clip_layer of “CLIP Set Last Layer” to -2 because we want to set what we define as Clip skip: 2 in A1111 WebUI.
Loading LoRA:

Select the LoRA model by lora_name in “Load LoRA”. This time, I wanted to add details, so I loaded add_detail. Set strength_model to 1.50 to increase the weight a little.
Input image settings:

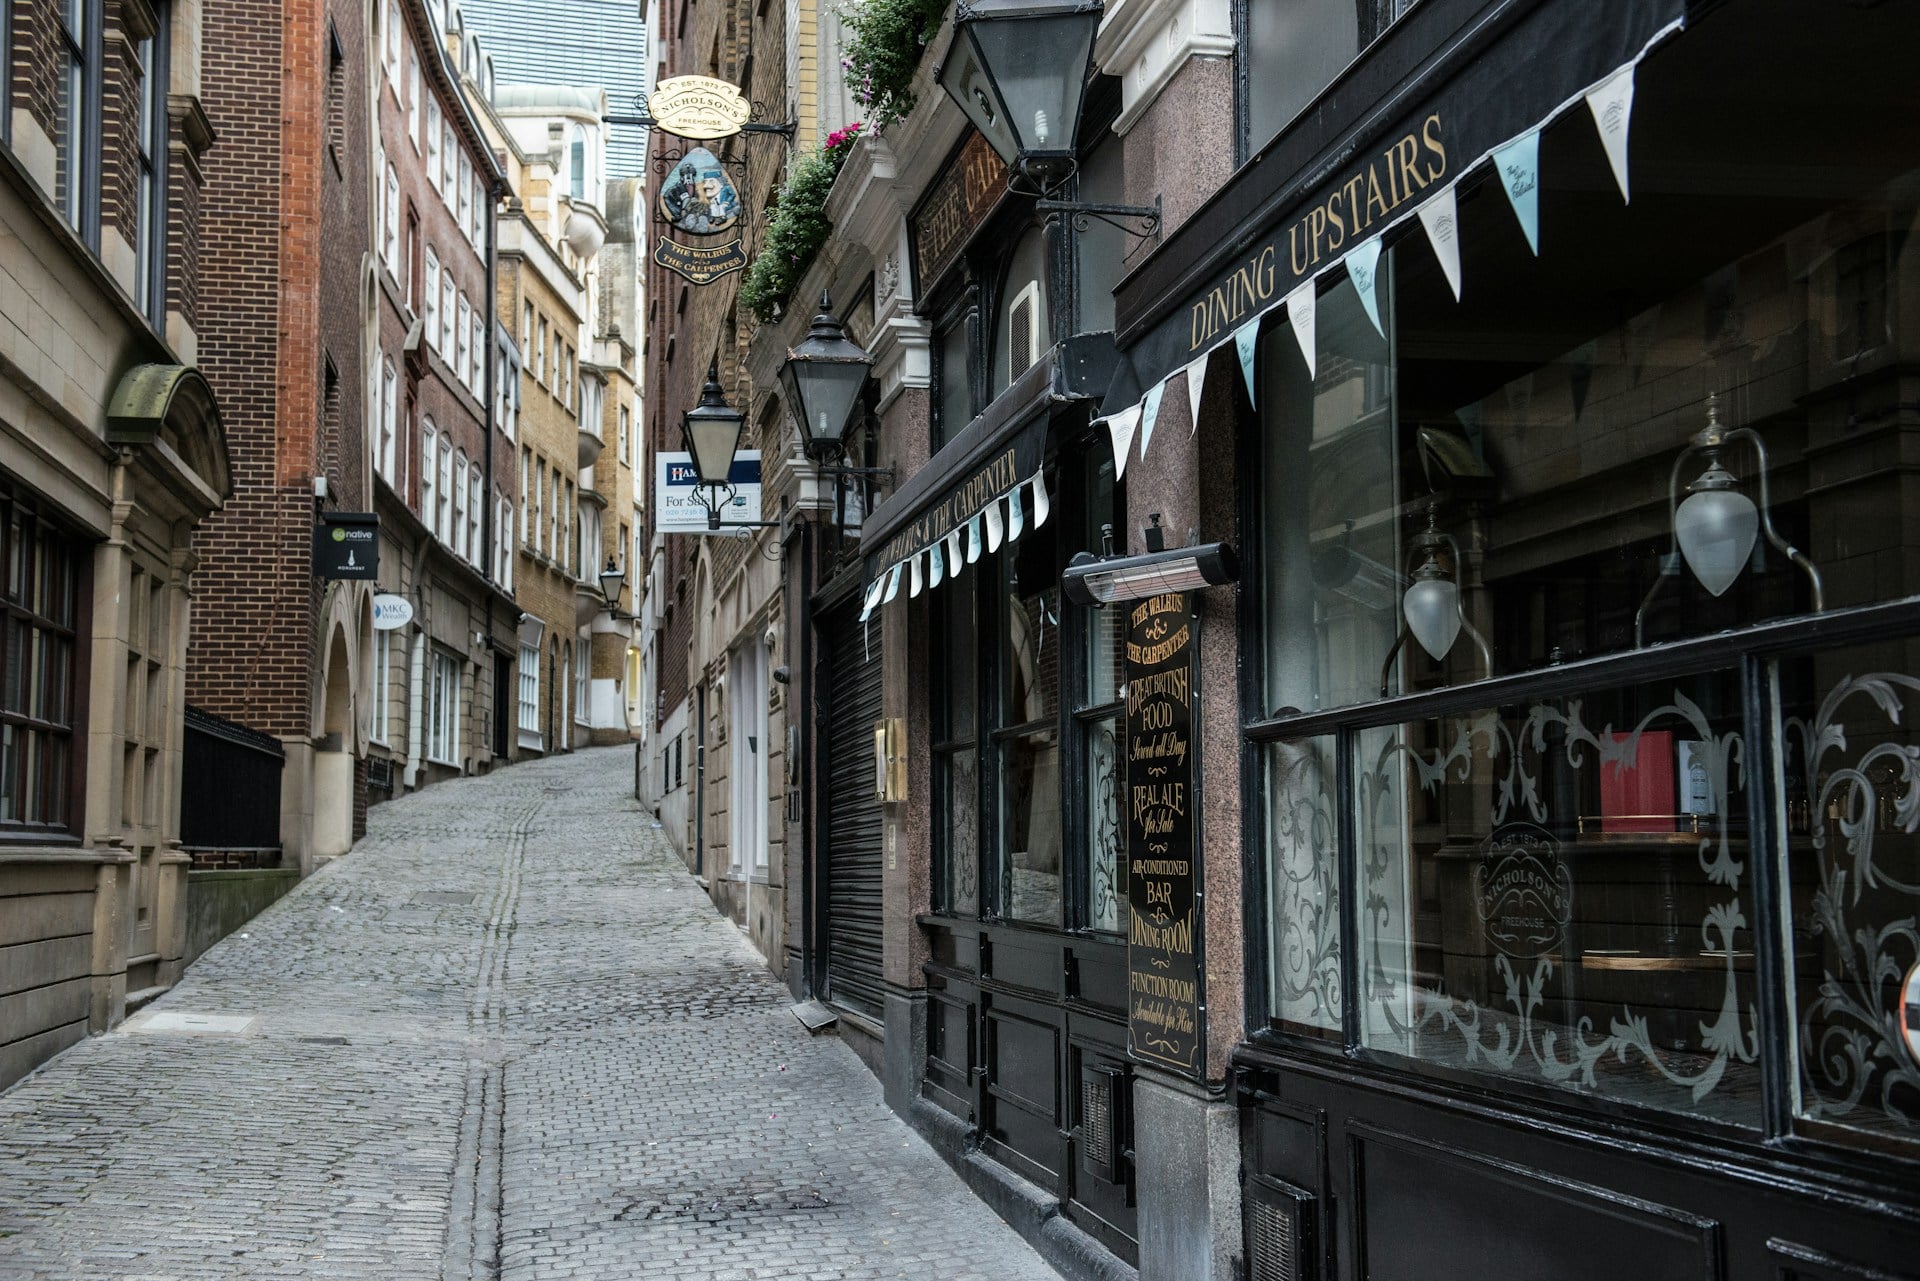
Load the input image into “Load Image”. This time, as in the previous article, we will load a photo of a 🔗photo of a London back street borrowed from Unsplash.
Under “Upscale Image,” resize the image to correspond to the SD1.5 model: set width to 768 height to 512 and change crop to center.
RepeatImageBatch” allows you to set the number of low-resolution samples to be used in the Preview Chooser. In this case, it is set to 2.
Entering Negative Prompt:

Positive prompts are automatically parsed, so copy the following prompts to the negative prompts. Here, the negative embedding “EasyNegative” is applied. *The second prompt, electric cable is for this input image, so delete it if you want to try other images.
(realistic:1.4), electric cable, worst quality, low quality, normal quality, lowres, text, (embedding:EasyNegative:1.2)If you do not have EasyNegative, download it from the 🔗Civitai page and place it in \ComfyUI\models\embeddings.
1st Pass settings:

Set Sampling steps to 30 for a firm drawing.
Change the CFG Scale to 3.0 because we want the generation to be a creative result.
We want to preserve some of the composition of the input image, so we set Denoising strength to 0.50.
Selecting the upscaler model:

Load Upscale Model to load an upscale model. In this example, we use 4x-UltraSharp.pth, but you can use any model you like.
Rescale settings:

Change the upscale_method of “ImageScaleToTotalPixels” to lanczos.
2nd Pass settings:

The 1st Pass has 30 steps, and we want to make an additional 5 steps, so we set Sampling steps to 35.
Set CFG to 3.0 to make the prompt less emphatic.
You can choose the sampler according to your preference, but this time we used the same combination of euler_ancestral and beta as in 1st Pass.
We want to maintain the composition of the input image, so we set Denoising strength to 0.35.
Tile size setting:

The default tile_size of “VAE Decode (Tiled)” is 512, which is fine, However, if the operation is too slow, lower the tile_size to 320.
Generation:
After a while, two low quality images will appear in the “Preview Chooser”, If there is a good one, you can select it and send it to the upscaling process with the “Progress selected image” button. If you are not satisfied with the result, click the “Queue Promt” button to generate the low quality image again, and repeat the process until you get a good result.

This completes the improved version of img2img. Please refer to Patreon for the workflow after completion, which is available free of charge.

Inpainting

We will start here, too, with the official Inpaint Examples.
Download the workflow image at the top of the linked page and drag and drop it into ComfyUI or load it from the Load button.
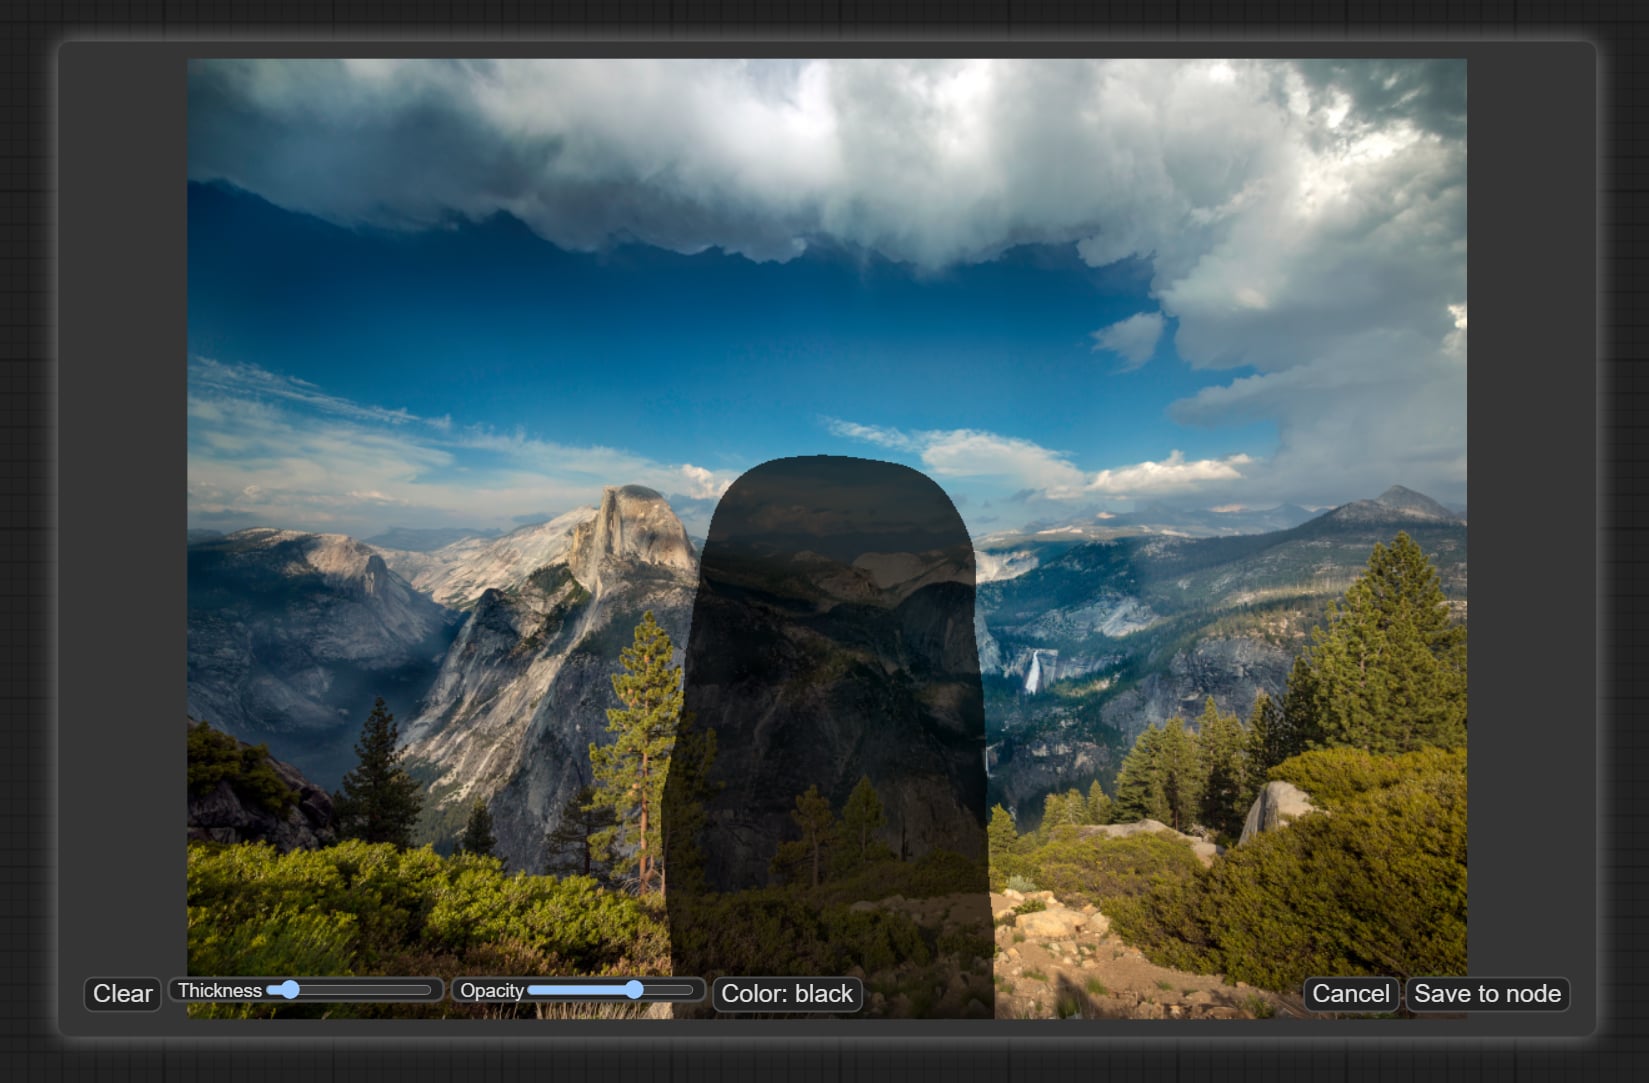
Download and load the second Yosemite photo from the top of Inpaint Examples into Load Image.
When loading is complete, load the model of your choice from ckpt_name in the “Load Checkpoint” node. *Example uses the SD2.0 inpainting model “512-inpainting-ema.safetensors”, but can also be used with regular checkpoint models.
Change the prompts, etc. and try things out.
About the Mask
In ComfyUI, you can specify a mask by selecting “Open in MaskEditor” in the right-click menu of the loaded image, and the image saved in MaskEditor is also saved in Clipspace and can be edited from “Clipspace” in the main menu.
If you have difficulty using MaskEditor, you can create a mask using a Photoshop or GIMP layer mask and save it as a PNG file containing the mask, which will be recognized as a mask in ComfyUI.
However, if you open the PNG file again with Photoshop or other software, the masked area will be deleted. To avoid overwriting the original image, it is recommended to first save it as a separate file for ComfuUI.
Improve the official Inpaint Examples
From here, we will try to improve the official Inpainting Examples into a more practical Inpainting workflow. Although similar to img2img, the following is a list of examples we would like to implement.
- Implement a process for using a simple inpainting model.
- Adapt Clip skip.
- Adapt LoRA.
- Adapt the VAE model.
- An “Image chooser” custom node was implemented to streamline the workflow flow.
- Implement a second pass because the quality of generation is not good.
- Use Tiled decoding to save memory.
The above items will be implemented and refined into a workflow that generates people and stalls in the input image.
Installing Custom Nodes:
Since “Image chooser” was used in img2img earlier, we will use it as is. If you have not installed it, please refer to “🔗1-1. Improve the official Img2Img Examples”.
Inpaint Model Installation:
This workflow requires the checkpoint models “sd-v1-5-inpainting” and “sd-v1-5-pruned-emaonly”. The official models were available on Runway’s Hugging Face page, but have been removed and are no longer available for download. As an alternative, “sd-v1-5-inpainting” is available on Hugging Face by camenduru. As for “sd-v1-5-pruned-emaonly”, we will introduce the page published by emmajoanne.
In addition, the following model is used for SDXL, although it is not explained in this example.
Inpainting model implementation:

First, call two “Load Checkpoints” and change the models to sd-v1-5-inpainting and sd-v1-5-pruned-emaonly respectively.
Call “ModelMergeSubtract” and connect “sd-v1-5-inpainting” to model1 and “sd-v1-5-pruned-emaonly” to model2.
Call “ModelMergeAdd” to connect the previous model to model1 and the model you want to use this time to model2.
This configuration removes the sd-v1-5-pruned-emaonly part from sd-v1-5-inpainting, and adds the new model we want to use this time to create the inpainting model.
- Load Checkpoint: loaders > Load Checkpoint
- ModelMergeSubtract: advanced > model_merging > ModelMergeSubtract
- ModelMergeAdd: advanced > model_merging > ModelMergeAdd
Clip skip / LoRA adaptation:

Connect “CLIP Set Last Layer” to the CLIP out of the main “Load Checkpoint” and also connect “Load LoRA” to the CLIP out of “CLIP Set Last Layer”.
Connect the CLIP out of “Load LoRA” to the two “CLIP Text Encode (Prompt)”.
Then, connect the MODEL out of “ModelMergeAdd” you just created to the model input of “Load LoRA” and from there to “KSampler”.
- CLIP Set Last Layer: conditioning > CLIP Set Last Layer
- Load LoRA: loaders > Load LoRA
Adjustment of input image:

Remove the “VAEEncodeForInpaint” node and add “Upscale Image” and “RepeatImageBatch”.
- Upscale Image: image > upscaling > Upscale Image
- RepeatImageBatch: image > batch > RepeatImageBatch
Adjustment of Mask:

The mask size must be reduced as well as the input image, so “Convert Mask to Image” is used to convert the mask to an image.
After reducing the image with “Upscale Image”, use “ImageBlur” to blur the edges.
Then use “Convert Image to Mask” to convert it back to a mask.
- Convert Mask to Image: mask > Convert Mask to Image
- ImageBlur: image > postprocessing > ImageBlur
- Convert Image to Mask: mask > Convert Image to Mask
Prepare data for inpainting:

In the official example, using “VAEEncodeForInpaint”, but this time we will use “InpaintModelConditioning” to create the data.
Connect the two prompts to the “InpaintModelConditioning” input, plus the reduced input image and mask.
- InpaintModelConditioning: conditioning > inpaint > InpaintModelConditioning
Adaptation of external VAE:

This time, we want to make VAE a separate model, so we call “Load VAE” and connect it to “InpaintModelConditioning”.
- Load VAE: loaders > Load VAE
Sharing Seed:

Externalize the seed value by right-clicking on the KSampler node and selecting “Convert seed to input”. Drag the seed input ● to bring up a list of nodes that can be selected, and select “Primitive“.
- Primitive: utils > Primitive
Implementation of “Image chooser”:

Replace the “Preview Chooser” node with the “Save Image” node. Leave the “Save Image” node as it will be used at the end. We also need to connect the “PlaySound 🐍” node because we want a sound notification when this node is executed.
- Preview Chooser: Image chooser > Preview Chooser
- PlaySound 🐍: utils > PlaySound 🐍
Upscaling with Model:

Connect the images out of “Preview Chooser” to “Upscale Image (using Model)”. Connect UPSCALE_MODEL out of “Load Upscale Model” to “Upscale Image (using Model)”.
- Upscale Image (using Model): image > upscaling > Upscale Image (using Model)
- Load Upscale Model: loaders > Load Upscale Model
Resize upscaled image to size for 2nd Pass:

Connect IMAGE out of “Upscale Image (using Model)” to “ImageScaleToTotalPixels”.
- ImageScaleToTotalPixels: image > upscaling > ImageScaleToTotalPixels
Create mask for 2nd Pass:

The mask for the 1st pass is scaled down, so it is converted to an image and upscaled.
The mask for the 1st pass is converted to an image using “Convert Mask to Image”.
Then “ImageScaleToTotalPixels” makes the images in the 2nd pass the same size.
Then use “Convert Image to Mask” to convert it back to a mask.
Composite backgrounds other than inpainting with the original:

Once reduced and upscaled, the original image is blurred and is replaced with the original.
After placing “ImageCompositeMasked”, connect “Load Image” to the destination, the 2nd pass image to the source, and the upscaling mask created earlier to the mask.
- ImageCompositeMasked: image > ImageCompositeMasked
Implementation of 2nd pass:

Prepare data using “InpaintModelConditioning” as in the 1st pass.
Create a new “CLIP Text Encode (Prompt)” with the following prompt entered in the positive input. For clip, connect the CLIP out of Load Lora.
very detailed, masterpiece, intricate details, UHD, 8KThe negative input is connected to the same CONDITIONING out as the first one.
Connect “Load VAE” to vae.
For pixels, connect the out of ImageCompositeMasked that was just composited.
Then, connect the mask you just enlarged to the mask.
Place the “KSampler” and connect the InpaintModelConditioning you just created, making the same connections to the model and the externalized seed as you did the first time.
- CLIP Text Encode (Prompt): conditioning > CLIP Text Encode (Prompt)
- KSampler: sampling > KSampler
Upscale + Downscale for image clarity:

To sharpen the final result, use “Upscale Image (using Model)” to enlarge the image and “ImageScaleToTotalPixels” to reduce it to the desired size. This will make the final result sharper.
Save Image:
Finally, connect the IMAGE out of “VAE Decode (Tiled)” to the “Save Image” that you left earlier.
This completes the implementation. We will then enter the parameters as we explain how to use it.
How to Use Custom Inpaint Examples
Load input images and create masks:
The size of the input image is limited in this workflow. The correct size of the input images are available on Google Drive, so please use those.
Drag and drop the above image to “Load Image” or click the “choose file to input” button.
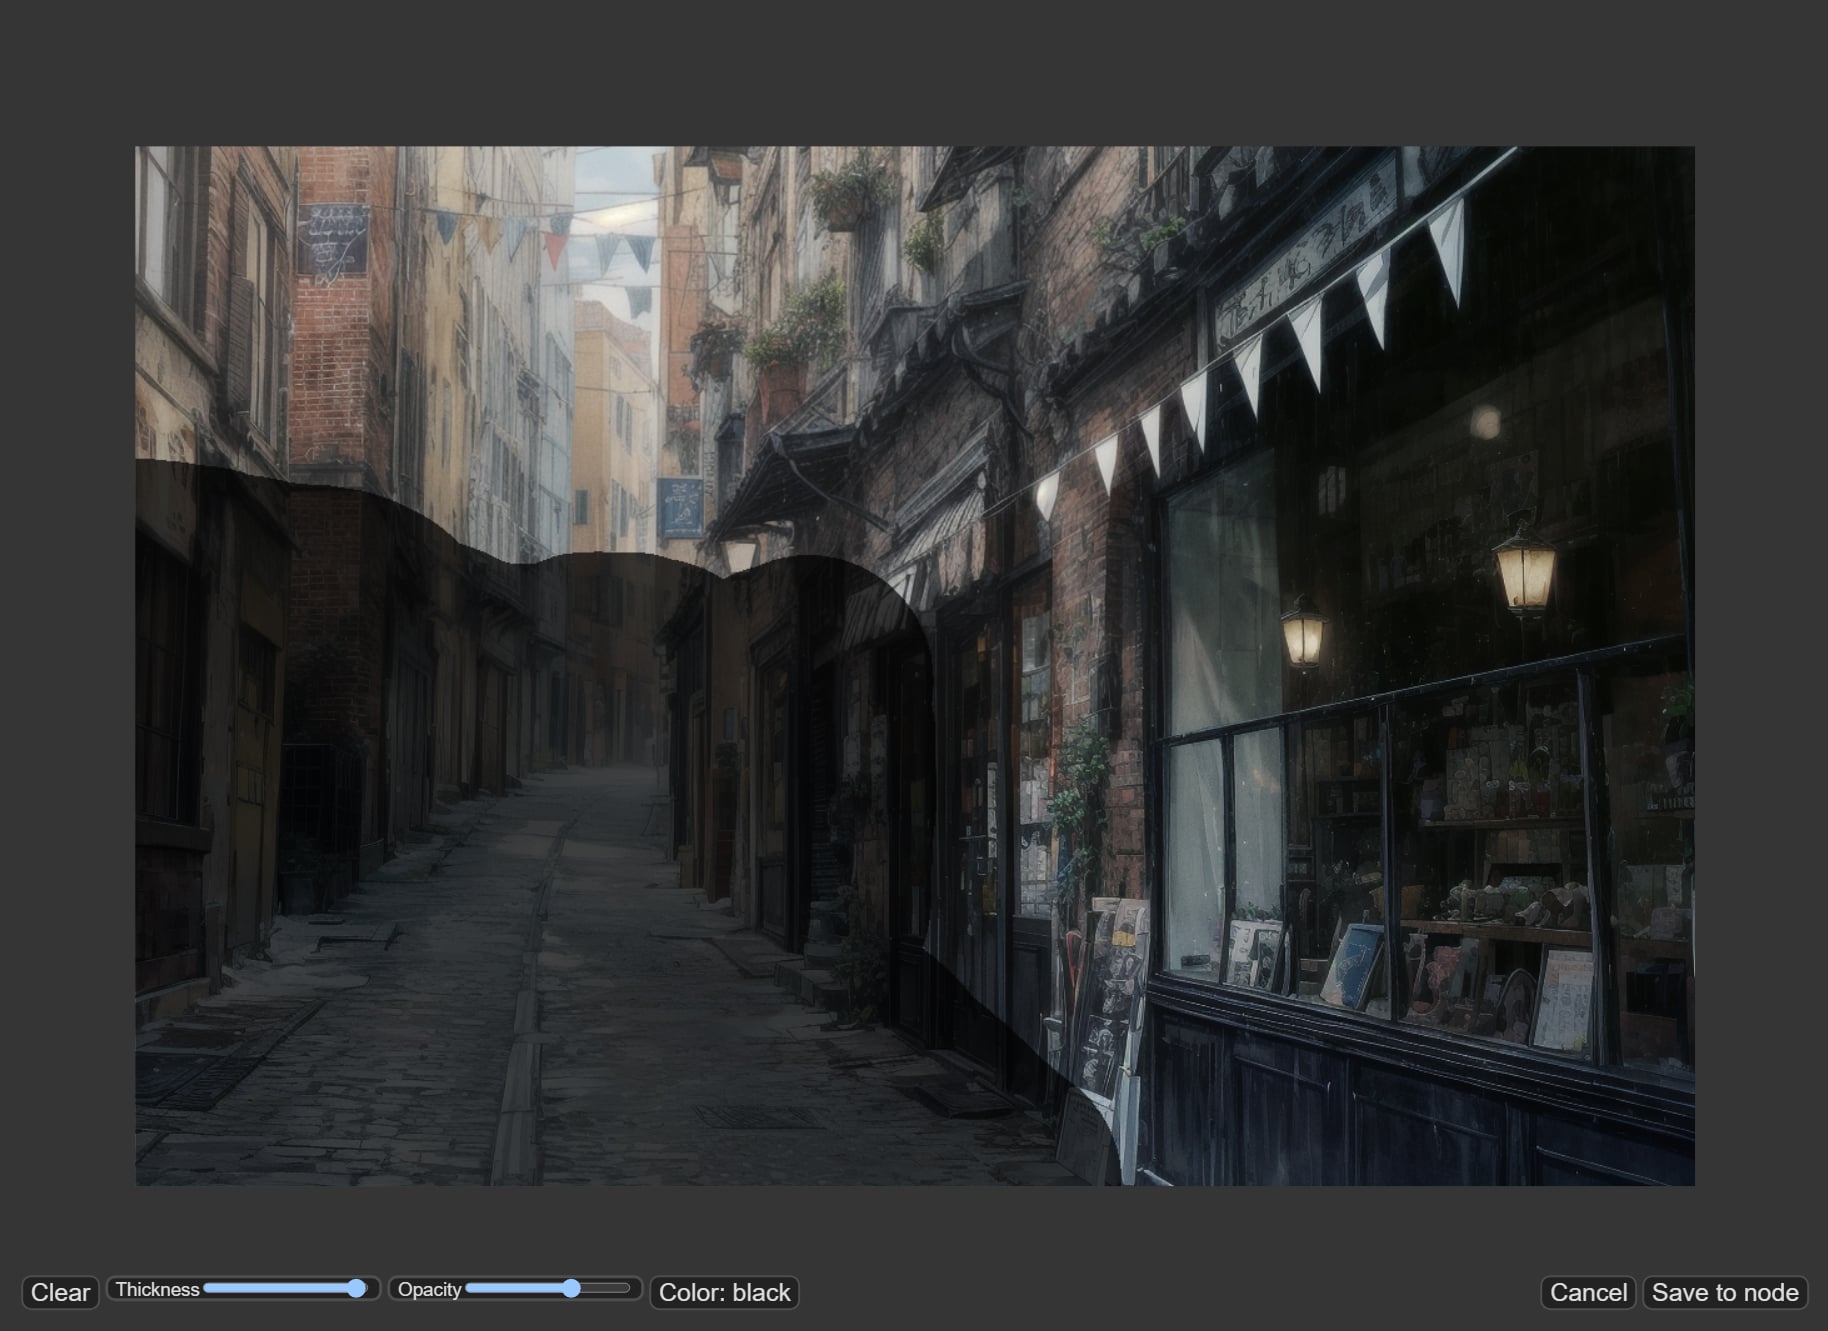
After loading is complete, right-click on the node and select “Open in MaksEditor” to open the mask editor and fill in the area to be inpainted. In this case, we want to paint the people walking on the street and the stalls, so mask any area you want.
Checkpoint Model Selection:
Specify the model by ckpt_name in “Load Checkpoint”. Again, darkSushiMixMix_225D is used. You can use any model you like, but you need to adjust the parameters for the model a little.
Clip skip / LoRA settings:

Again, we want to set Clip skip: 2, so set stop_at_clip_layer in “CLIP Set Last Layer” to -2.
As for LoRA, it is not used in this case, so it is bypassed; if you want to use LoRA, please unbypass it.
Adjust input image:

Scale the input image to a size suitable for the SD1.5 model. Set the size of “Upscale Image” connected to each image and mask to 768 for width and 512 for height.
Set blur_radius of “ImageBlur” to 10 to blur the edges of the mask.
VAE Selection:

VAE selects the standard vae-ft-mse-840000-ema-pruned.safetensors.
Entering Prompts:
The prompt is to inpaint the people walking down the street and the stalls, so please write the following
Positive Promptmasterpiece, peoples, adventurer, ultra detailed, medival, fantasy, marketworst quality, low quality, normal quality, lowres, text, ugly, ugly face, deformed, deformed face, bad anatomy1st Pass settings:

We wanted to increase the amount of drawing slightly, so stesp is set to 25.
cfg/sampler_name/scheduler could have been left as default, but change scheduler to beta.
denoise is set to 0.90 because we wanted to blend in with the input image.
Upscale settings:

Upscale model to 4x-UltraSharp.
Change the mask upscaling method to lanczos to make it smooth.
2nd Pass settings:

The 1st pass was 25 for the STEPs, so we’ll do a plus 10 to make it 35.
The sampler_name is a bit heavy, but use dpmpp_sde, and set the scheduler to karras.
Image Sharpening Settings:

The last image sharpening setting uses 4x-UltraSharp for the model.
The “ImageScaleToTotalPixels” magapixels is set to 1.50 to make it slightly larger.
Generation:
The method of generation is the same as that of img2img, and after a while, two low quality images will appear in the “Preview Chooser”. If you like the result, you can send it to the upscaling process by clicking the “Progress selected image” button. If you are not satisfied with the result, click the “Queue Promt” button to generate the low quality image again, and repeat the process until you get a good result.

This completes the improved version of the Inpainting Example. The completed workflow is available free of charge on Patreon for your reference.

Conclusion
In this article, we have introduced how to use image2image with ComfyUI. Since this is a basic article, We have customized the workflow so that it is not too complicated, If you implement the custom node “ComfyUI-Inpaint-CropAndStitch”, you can scale up the inpainting area like the Only masked mode in A1111 WebUI, and then inpainting the image and combining it with the original image. When we get a chance, we would like to introduce a complex inpainting workflow.
Thank you for reading to the end.
If you found this even a little helpful, please support by giving it a “Like”!