Basic usage of Stable Diffusion Web UI Image-to-image section

- Description of img2img interface
- About img2img mode
- How to use Canvas
- About Resize mode of img2img
- About Denoising strength
- About img2img’s Soft inpainting
- About color correction of img2img
- About the transparent part of the input image
- About the canvas size in Sketch mode
- Only masked and target size in inpainting mode
- Example of img2img mode usage
- Example of Sketch mode usage
- Example of Inpaint mode usage
- Example of Inpaint Sketch mode usage
- Example of Inpaint upload mode usage
- Example of Batch mode usage
- Conclusion
In this article, I would like to explain the basic usage of A1111 Stable Diffusion web UI’s “Image to image (img2img)”. img2img allows you to create a new illustration using your input and prompts. You can use the generated AI to create a clean drawing from a rough sketch, or you can input the generated illustration to modify the hands and face, and remove unnecessary parts.
Description of img2img interface
Explanation of each area


About Checkpoint / Prompt Area

About Generate button Area

About Preview Area

About page switching area

About image input area

About the Generation Parameter Area

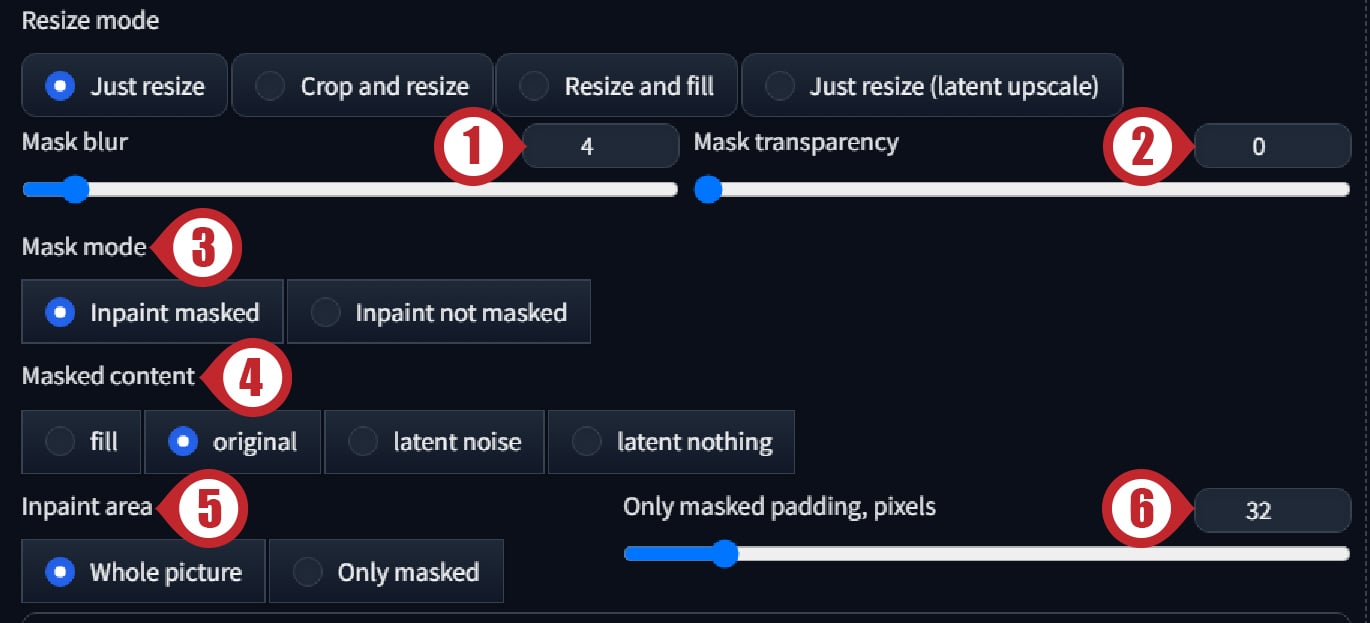
- Inpaint masked: Inpaints within the mask selection.
- Inpaint not masked: Inpaints the area outside of the mask selection.
- fill: Fills the input image with the average color within the masked area.
- original: The input image is used as is.
- latent noise: Fills the masked area with Seed-based noise. It can be used to mask an object and rewrite the background.
1is recommended for CGF. - latent nothing: Fills the masked area with the average color of the masked area. It can be used to mask an object and rewrite the background.
0.8or higher is recommended for CGF.
- Whole picture: Apply inpainting to the entire image, including outside the mask area.
- Only masked: Apply inpainting only within the mask area.
About img2img mode
The A1111 Stable Diffusion web UI’s Image to image has six modes. It is explained in detail with examples of its use later in this article, so we will briefly describe it here.
- img2img: Default mode. Generates illustrations with a composition similar to the input image.
- Sketch: Upload an image with a single background color, draw a sketch on the canvas, and generate an illustration from it.
- Inpaint: A mask is specified on the input illustration, and an illustration is generated based on it.
- Inpaint sketch: It is similar to Inpaint mode, but the difference is that Inpaint can only specify a mask, while Inpaint sketch can also be used as a mask and lead generation by the sketch.
- Inpaint upload: Upload an input image and a mask image, The illustration is created based on the input image and mask image. This mode is used when you want to inpainting an illustration created with software such as Photoshop.
- Batch: Multiple input images can be processed in the img2img process at once.
How to use Canvas
Canvas is a tool for drawing sketches and specifying masks on the input image. Use the mouse to draw with a brush.

- Alt + Mouse Wheels: Zoom in and out on the canvas.
- Ctrl + Mouse Wheels: Sets the size of the brush.
- R key: Resets the zoom of the canvas.
- S key: Put the canvas in full screen mode; press the R or S key again to go to normal mode.
- F key: You can move the canvas by holding down the F key and dragging the mouse.

- Undo button: Cancels the previous brush.
- Clear button: Delete all brushes on the canvas.
- Remove button: Deletes the input image.
- Use brush button: Sets the size of the brush.
- Select brush color button: Sets the color of the brush. (Sketch and Inpaint sketch only)
About Resize mode of img2img
Resize mode allows you to change the settings when zooming in and out.
- Just Resize: The aspect ratio is not maintained, so the image will stretch or shrink if the aspect ratio of the destination size is different.
- Crop & Resize: The aspect ratio is maintained and the overhang is removed.
- Resize & Fill: The image is scaled to fit the specified destination size while maintaining the aspect ratio. The excess area will be filled with the color of the edge of the input image.
- Just Resize (Latent Upscale): Same as Just Resize, but uses Latent Upscale for scaling.
About Denoising strength

Denoising strength is a value that determines how close to the input image the image will be generated, and is the same parameter as the denoising strength in txt2img’s Hires.fix.The above sample is generated in img2img mode by changing the prompt from black chair to white chair.
- 0.0: No change
- 0.35: Slight change
- 0.75: Quite a change
- 1.0: Most changes
About img2img’s Soft inpainting
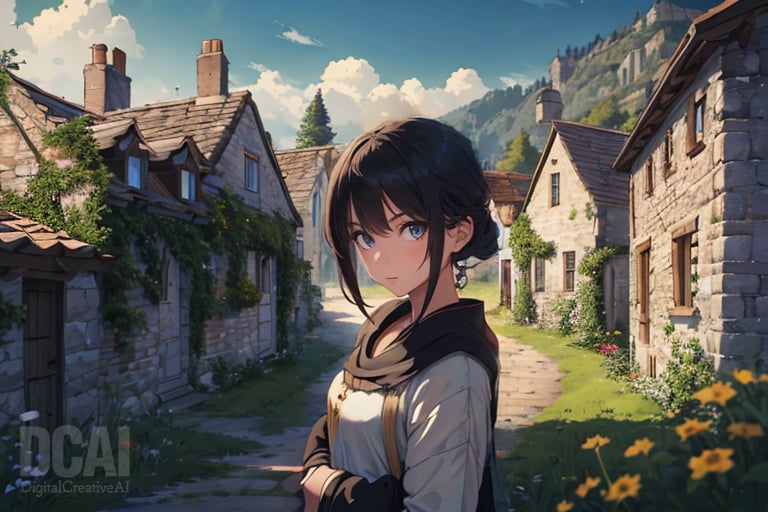
Soft inpainting blends the border between the mask and the background without discomfort when using Inpaint mode. It is recommended to set the mask blur to a high value. Ex. Mask blur: 20
About Soft inpainting parameters

- Schedule bias: This is the bias at which step of the sampling process the input image is maintained. The default is 1. If it is set higher than 1, it will be maintained from the beginning of the sampling process. However, if the value is too high, the additional portion of the image will be reduced. On the other hand, if it is too small, it will be maintained from the later stages of sampling, so that the border between the input image and inpaint image will be more noticeable.
- Preservation strength: This is the intensity of the maintenance of the input image. The higher the value, the more the input image is maintained.
- Transition contrast boost: Adjusts the difference between the input image and the inpainting. The default is 4. The higher the number, the sharper the border. Conversely, the lower the number, the smaller the inpainted object will be, but the smoother the border will be.
- Mask influence: This is the degree of influence of the mask. The higher the number, the greater the influence of the mask. 0 means that the mask is ignored. *When tested with v1.10.1, changing this value did not change the result.
- Difference threshold: This is the threshold for the difference from the input image. The default value is 0.5. The larger the value, the more transparent the inpainted area becomes.
- Difference contrast: Adjusts the difference between the input image and the inpainted area. Default is 2. The smaller the value, the more transparent it becomes.
Examples of Soft inpainting usage
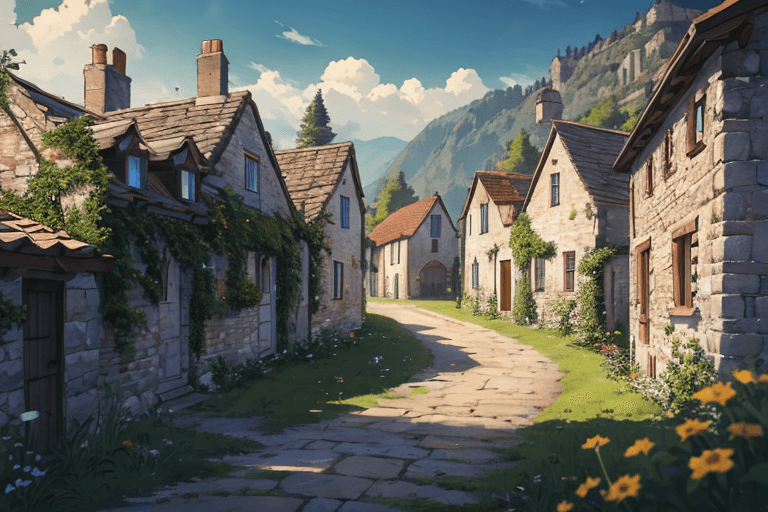
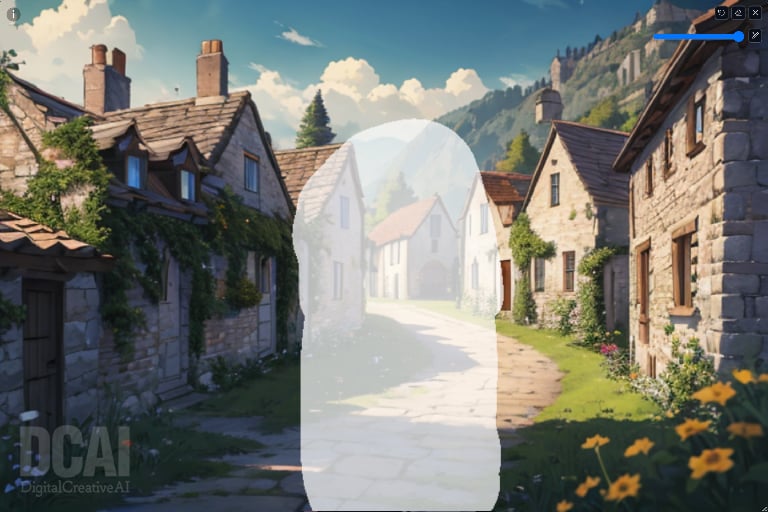
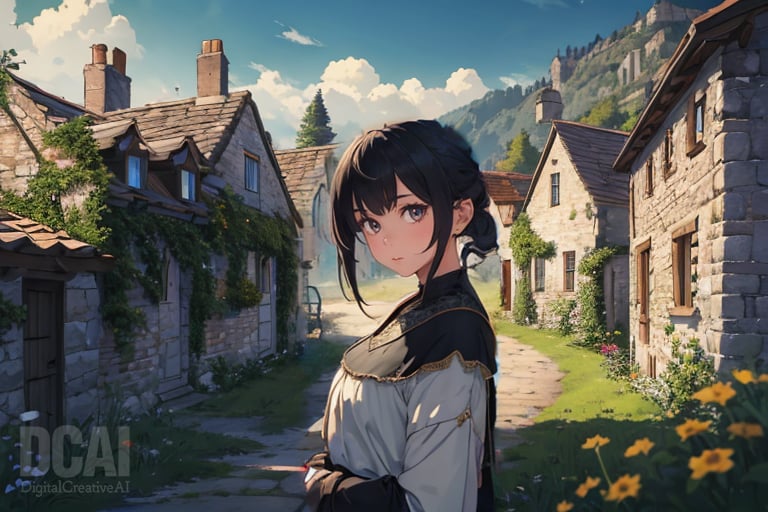
In the sample, soft inpainting is applied with default values except for CFG and Size; without soft inpainting, the mask borders are noticeable, but with soft inpainting, the borders are barely discernible.
About color correction of img2img

The color of the generated illustration may change when using img2img; use the color correction feature of A1111 WebUI.
- Open the settings page on the Settings tab.
- Select img2img in Stable Diffusion from the list on the left.
- Check the box marked “Apply color correction to img2img results to match original colors.“
- Press the Apply settings button to apply the settings.
This completes the settings, but if you switch frequently, add the following method to the Quicksettings list.
- Select User Interface in User Interface from the list.
- Enter
img2img_color_correctionin the Quicksettings list and select it from the list. - Press the Apply settings button to apply the settings.
- Click the Reload UI button to restart the system. If a check box appears at the top of the UI after startup, the setup is complete.
About the transparent part of the input image
If the input image is a PNG or other image that has transparent areas, they will be used as white by default. This can be changed to a different color in the settings.
- Open the settings page on the Settings tab.
- Select img2img in Stable Diffusion from the list on the left.
- Change the color below the “With img2img, fill transparent parts of the input image with this color.“.
- Press the Apply settings button to apply the settings.
About the canvas size in Sketch mode
Note that the canvas in Sketch mode is affected by the custom scale setting of the display. If the display’s custom scale is set to a setting other than 100% in Windows, the canvas size will be affected.
For instance, if the display’s custom scale is set to 150% and the canvas is loaded with 512 x 512 pixels, the canvas will be 1.5 times larger, 768 x 768.
If you use “Resize to” to set the desired resolution, there is no problem, but if you use “Resize by” to set the resolution to Scale 1, the custom scale will result in a resolution of 768 x 768. In such a case, change the custom scale setting of the display to 100%.
Only masked and target size in inpainting mode
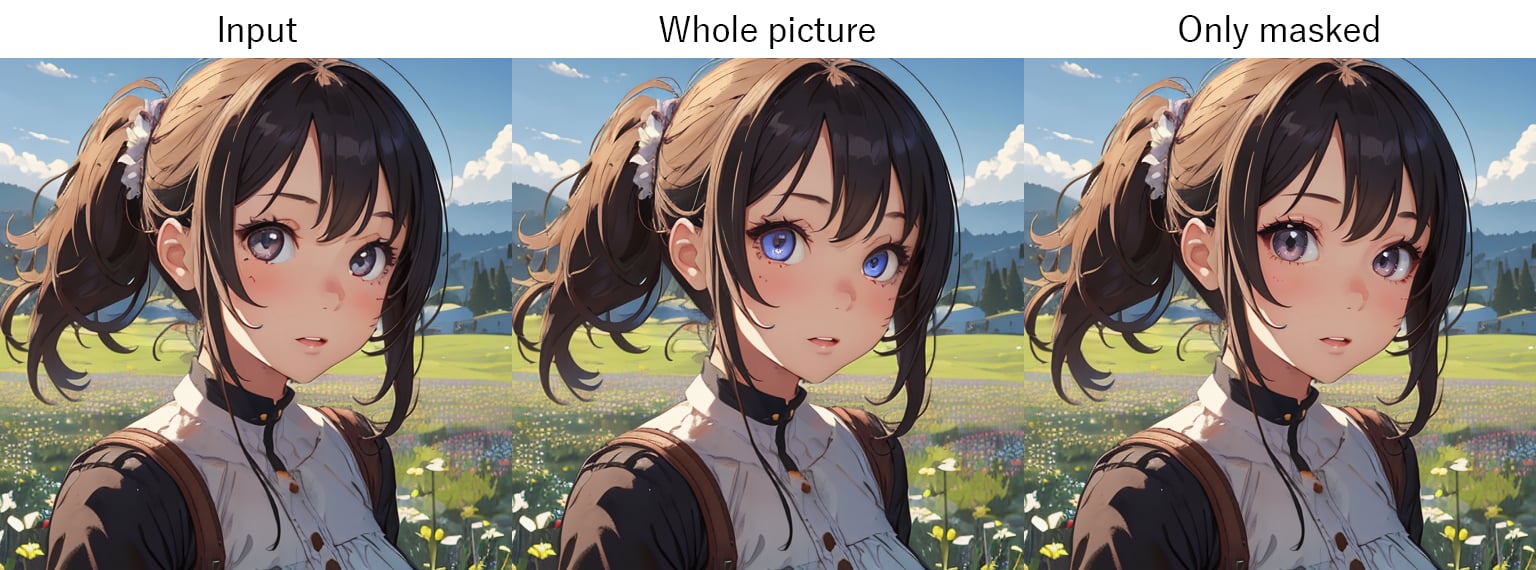
This is what DarkStooM wrote in his 🔗Gist, When using Only masked mode, the mask area is enlarged to the target size using the Upscaler model and then inpainting is applied, so it seems that the Only masked mode produces more detail. The comparison image above was generated at 512 x 512, and the inpainting mask was specified only for the eyes, and the image was generated at equal magnification.
The Upscaler model is not selectable by default, But you can select it by using the following method.
- Open the settings page on the Settings tab.
- Select User Interface from the list on the left under User Interface.
- Enter
upscaler_for_img2imgin the Quicksettings list and select it from the list. - Press the Apply settings button to apply the settings.
- Click the Reload UI button to restart the system. If Upscaler for img2img appears at the top of the UI after startup, the setup is complete.
Example of img2img mode usage
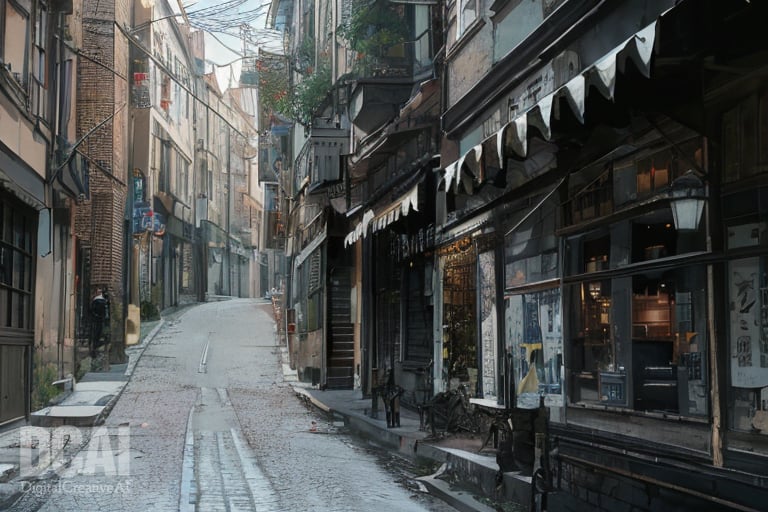
The img2img mode generates images based on the input image. The composition of the generated image will be the same as the original image, depending on the value of Denoise.
Let’s input a photo image to generate an illustration.
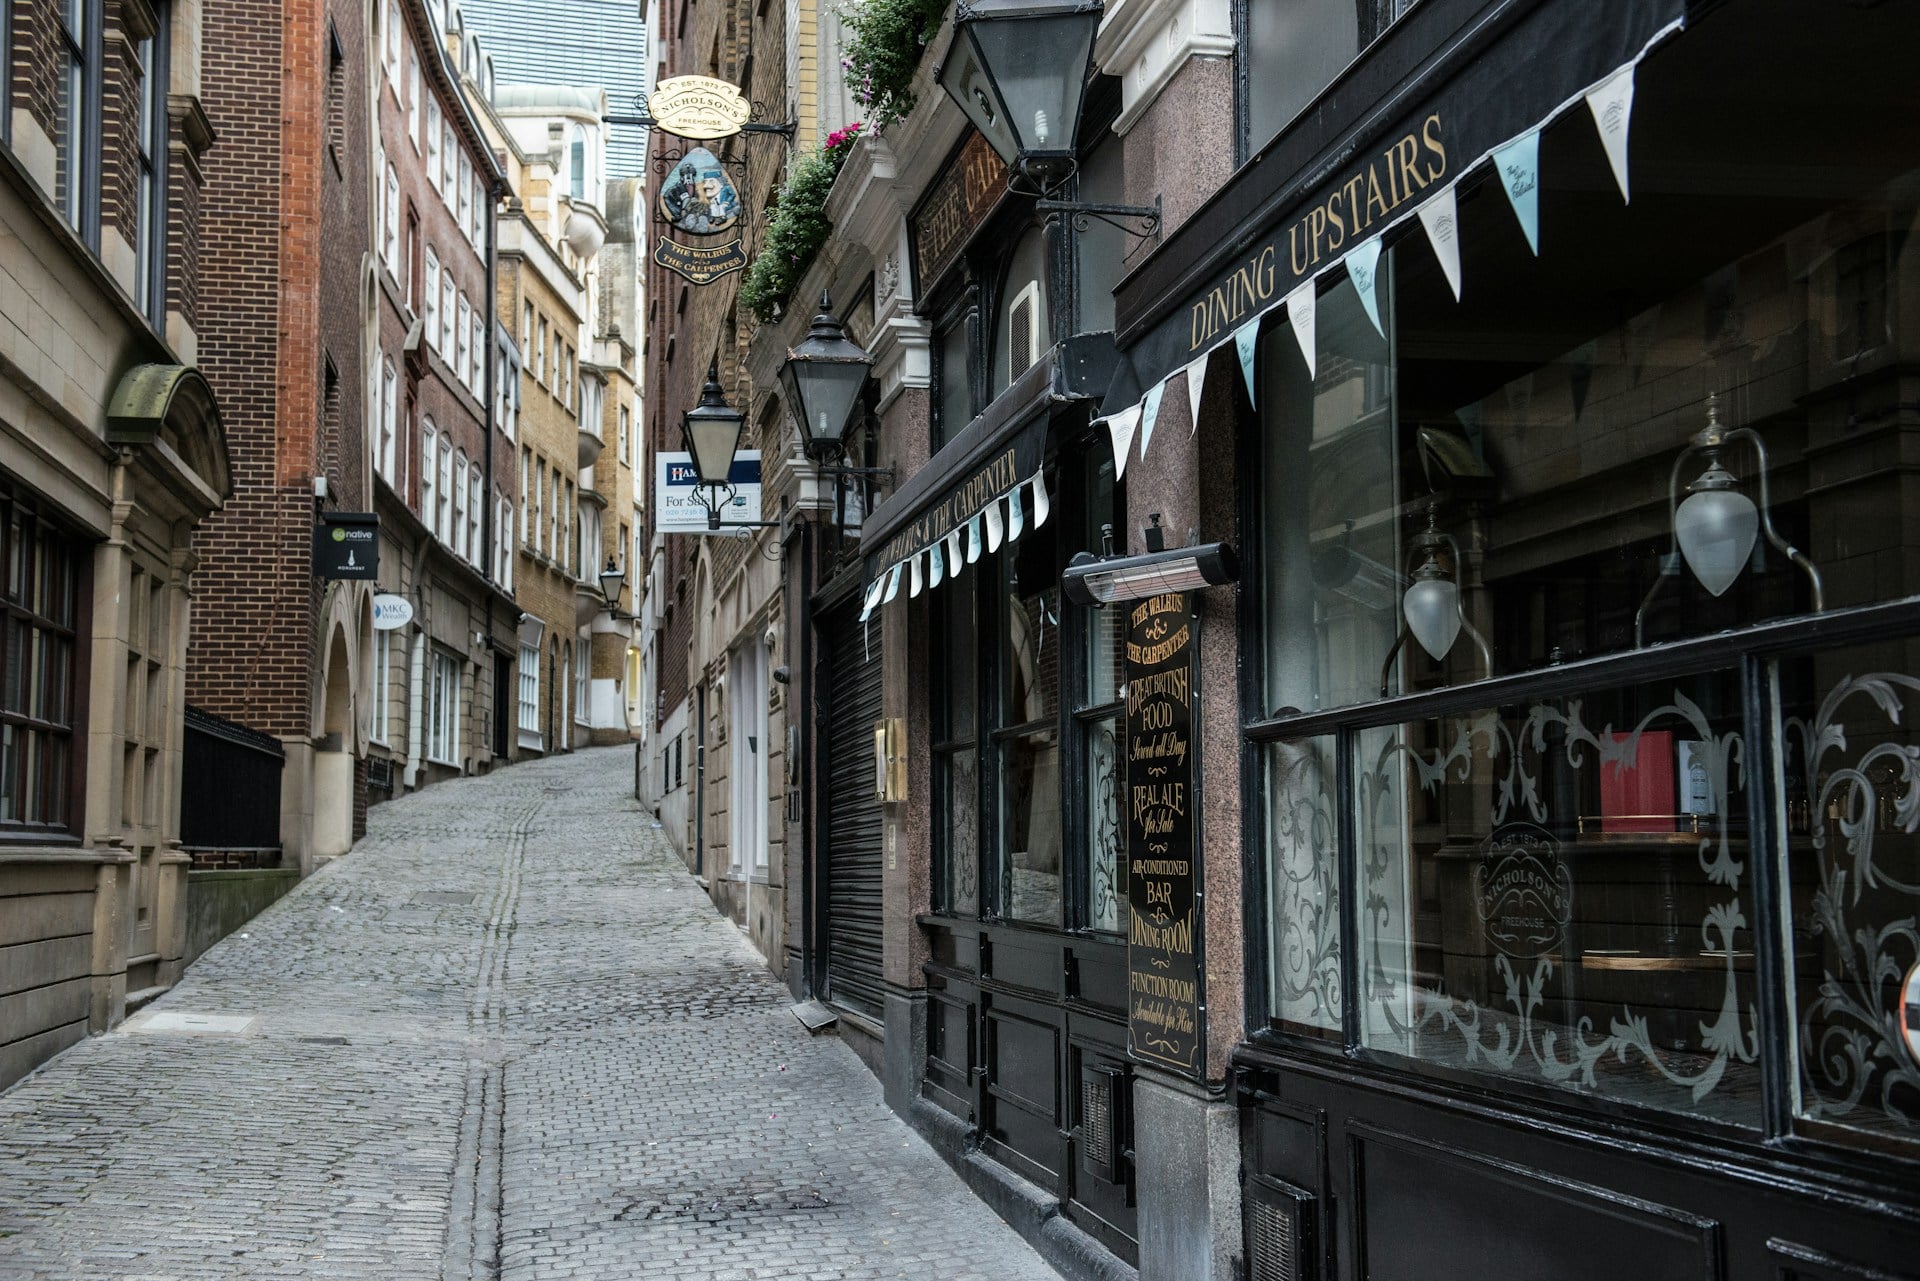
The input image will be a 🔗photo of a London back street borrowed from Unsplash. Drag or click this photo onto the canvas to load it.
The SD1.5 model (darkSushiMixMix_225D) used in this project favors the Danbooru style, so let’s analyze the prompt by clicking on the prompt generation button (DeepBooru) in the generation button area.
Once the analysis is complete, insert the following prompt at the beginning of the prompt to make it illustrative.
(anime style:1.5), Then paste the following prompt into the negative prompt. We use (realistic:1.5) for an illustrative tone.
(realistic:1.4),worst quality, low quality, normal quality, lowresChange the following parameters.
- Set Sampling steps to
30because we want to make sure the drawing is well defined. - Since the input image is 1920 x 1281 pixels, we set the Resize mode to
Crop and Resizeand the Resize to to768 (W) x 512 (H)to accommodate the SD 1.5 model we are using. - Change the CFG Scale to
3because we want to keep the style of the model. - We want to maintain the composition of the input image, so we set Denoising strength to
0.5.
Finally, generate it with the “Generate” button and you are done.
Example of Sketch mode usage
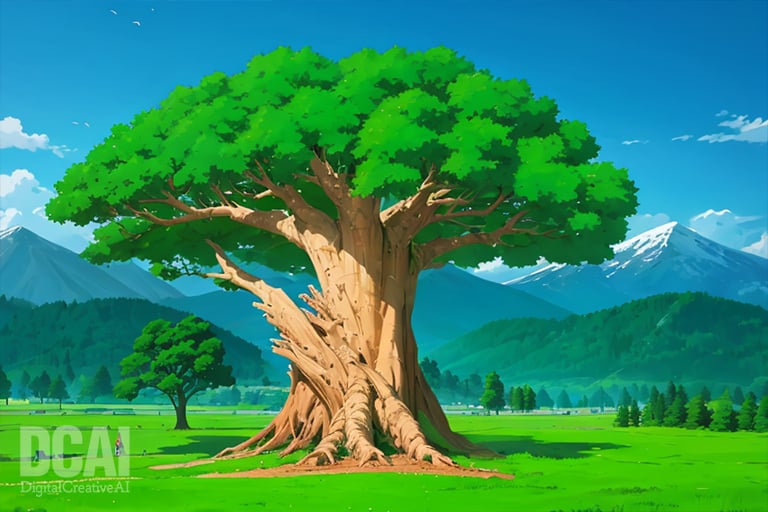
Sketch mode generates an illustration based on a sketch drawn on a canvas. In this case, we would like to generate a “giant tree standing in a meadow. Be careful with the scale of the display as described in “About the canvas size in Sketch mode“.
First, switch to sketch mode and create a solid color image of the desired size (768 x 512 in this case) in Photoshop or other software and load it. In this case, we will upload a light blue image as the sky color because it will be easier to use the background color as the single color later on.
Sketch a meadow, a tree, and a mountain in the background, changing colors, even if only vaguely on the canvas.

Once the sketch is written, paste the following prompt into the prompt.
big tree, plane field, mountains, blue sky, masterpiece, ultra detailedThen paste the following prompt into the negative prompt.
worst quality, low quality, normal quality, lowresSwitch the parameter from Resize to to Resise by and set Scale to 1.
Use the remaining settings as default. If you want the composition to be more like a sketch, lower the denoising strength. If you lower it too much, the image will look like a sketch, so find a good balance.
Finally, generate it with the “Generate” button and you are done.
Example of Inpaint mode usage
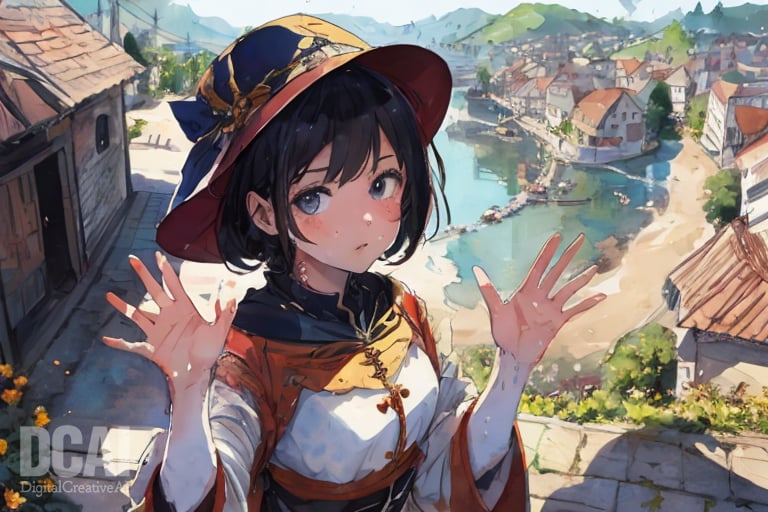
Inpaint mode is the most used mode in img2img and allows you to modify illustrations generated by txt2img.
First, use txt2img to generate illustrations with the following settings.
Prompt: 1girl, upper body, waving, smile, looking at viewer, medival, village, masterpiece, ultra detailed
Negative Prompt: worst quality, low quality, normal quality, lowres
Steps: 20
Sampler: DPM++ 2M
Schedule type: Karras
CFG scale: 7
Seed: 3546912850
Size: 768x512
Model: darkSushiMixMix_225D
VAE: vae-ft-mse-840000-ema-pruned.safetensors
Clip skip: 2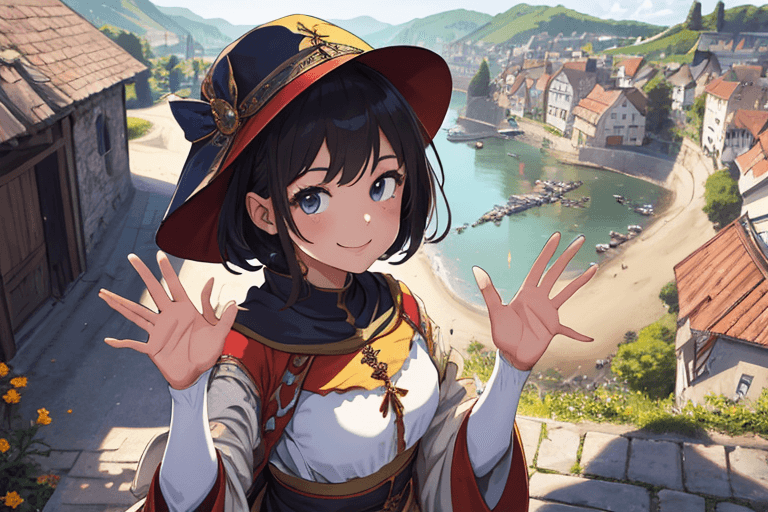
Once generation is finished, press the “send to img2img inpaint” button (red frame) in the preview area to switch to Inpaint mode.

In this case, the fingers are incorrectly placed, so we will correct them. You can fix both hands at once, but in most cases, you will not be satisfied with the result after one generation, so we recommend that you fix one hand at a time.
Now we will correct the left hand. The little finger is out of alignment, so we will mask the little finger and its correct position after the correction.
The prompt is taken over from txt2img, so insert the following prompt at the beginning.
five fingers, Switch the parameter from Resize to to Resise by and set Scale to 1. The other parameters are used as default.
Press the “Generate” button and continue generating until you are satisfied with the results. If you do not get a good result, try changing the CFG value.

If you are satisfied with the result, you want to modify the opposite hand, but first load the modified image onto the canvas with the “send to img2img inpaint” button, the same as for txt2img. The mask from earlier is still there, so you will erase it with the Clear button.
On the right hand, the tips of the ring and pinky fingers are not correct, and there is a finger-like object next to the thumb.
In this pattern, you can modify the ring and pinky fingers separately, but let’s modify them together. Mask the tips of the pinky fingers and whole ring fingers of the right hand on the canvas.

The prompts and parameters are the same as before.
If you are satisfied with the result, send it to canvas again with the “Send to img2img inpaint” button.
Finally, erase the finger-like object next to the thumb.

If you are removing elements inpaint, switch Masked content to fill. Also, a higher CFG increases the probability of flattening the original object. Conversely, a low CFG increases the chance of another object that is close in shape.
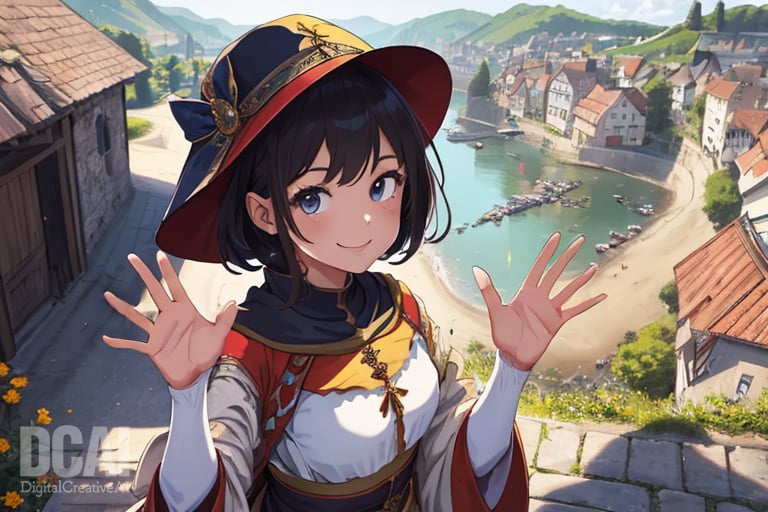
The above process has been used to correct the hand. As you can see, there is an element of luck involved. If you are not getting good results, you can try LoRA or Negative Embedding.
Example of Inpaint Sketch mode usage
Inpaint Sketch mode is a combination of inpainting and sketching, allowing you to add new elements to the input image in a sketch. Be careful with the scale of the display as described in the section “About the canvas size in Sketch mode“.
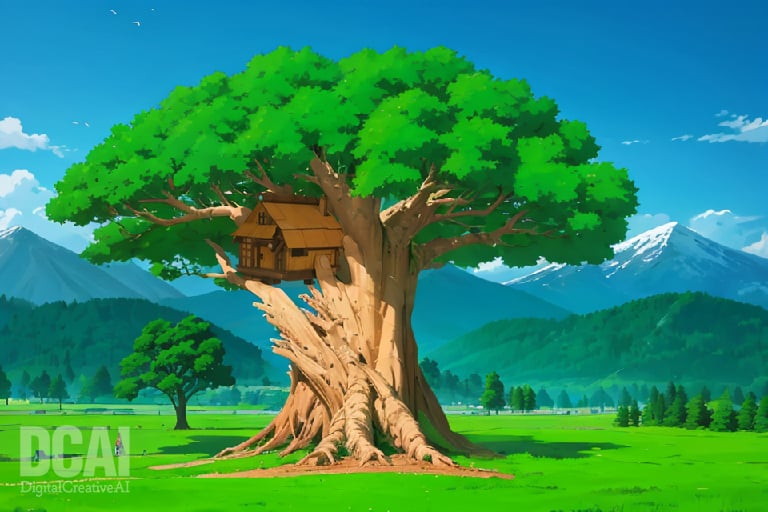
Let’s add a treehouse to the final result of the sketch mode.

A1111 WebUI does not have the ability to send to Inpaint sketch, so you can directly drag and drop the generated image or specify a file to load.
In the case of inpainting sketches, the sketch can be used as a mask as it is, so if you want to add a sketch, first draw a silhouette with a solid color, and then draw the outline of the desired picture on top of it, which will work well. In this case, We wanted to add a treehouse, so We drew the following sketch.

Once the sketch is written, paste the following prompt into the prompt. In this case, we are generating the Inpaint area with Only masked, so we are only concerned with the additions to be written and are not using any extra prompts other than the treehouse.
small tree house, masterpiece, ultra detailedThen paste the following prompt into the negative prompt.
worst quality, low quality, normal quality, lowresChange the following parameters.
- Set Mask transparency to
10to blend in with the background. - Select
Only maskedfor Inpaint area because we want to bring out details. - Set the Soft inpainting checkbox to
✅to further blend in with the background. The default settings are fine. - Since we want to generate the image in equal size, we switch from Resize to to
Resize byand set Scale to1. - We wanted to get as close to the sketch as possible, so we set the denoising strength to
0.5.
Finally, generate it with the “Generate” button and you are done.
Example of Inpaint upload mode usage
Inpaint upload mode allows you to upload an input image and a mask, respectively, for inpainting. There are various uses for this mode, such as when you want to create a clean mask in Photoshop, or when you want to inpaint a mask part exported by 3DCG software, etc.
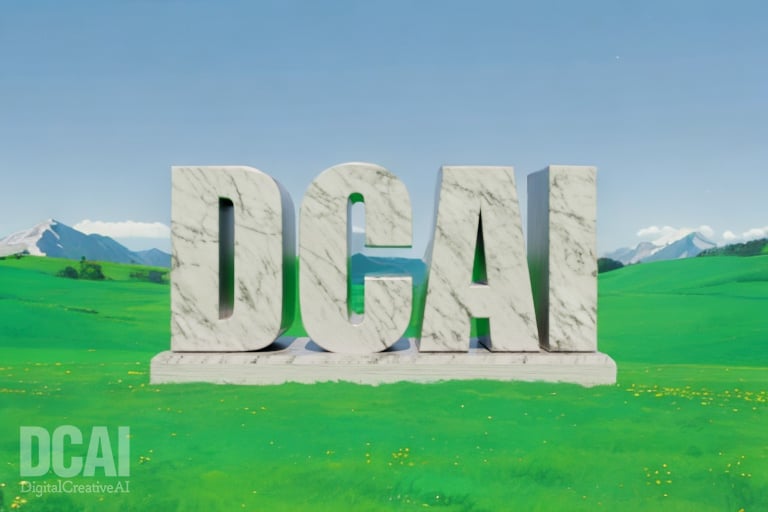
In this example, we will add a background to an image exported by 3DCG software.
The input image and mask will proceed using the following image.
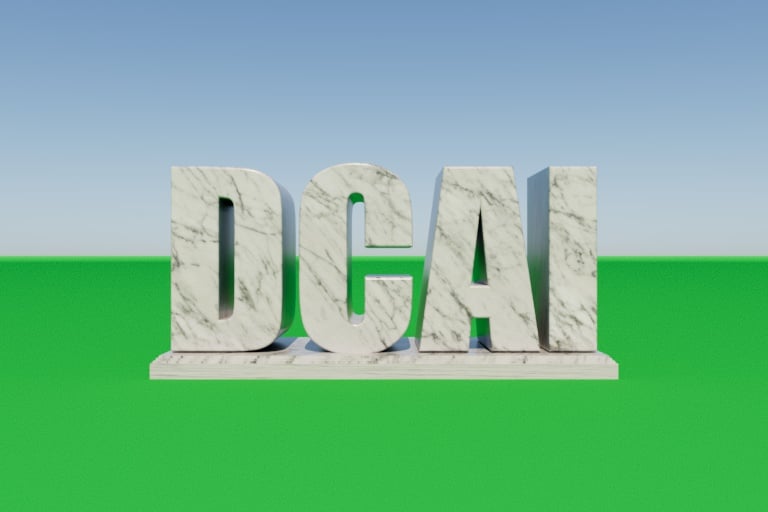
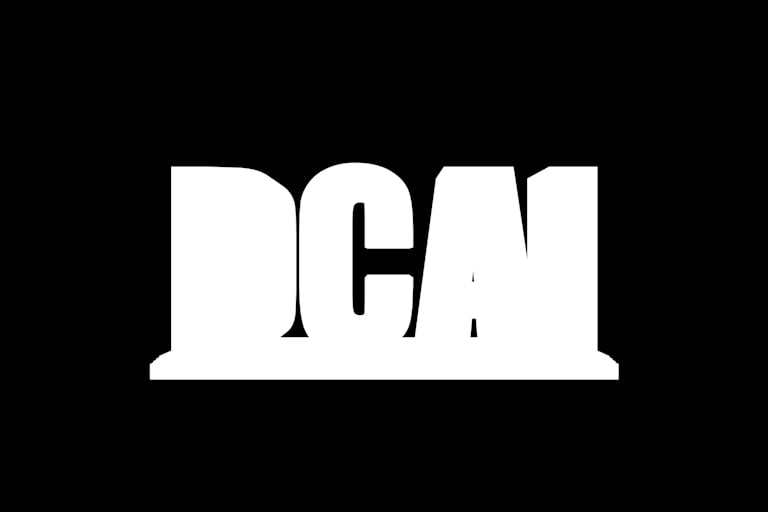
Load the above images into the input and mask, respectively.
Enter the prompt for background as follows.
blue sky, meadows, moutains, masterpiece, ultra detailedPaste the following prompt into the negative prompt.
worst quality, low quality, normal quality, lowresChange the following parameters.
- To invert the masked area to the background, set Mask mode to
Inpaint not masked. - The background should be generated based on the color of the input image, so set Masked content to
original. - Change the Sampling method to
DDIM CFG++and the Schedule type toDDIMto make the input images composite naturally and without discomfort. *If not listed, A1111 WebUI must be updated to v1.10 or higher. - Set Sampling steps to
30for better background rendering. - Since we want to generate the scale equally, switch from Resize to to
Resize byand set Scale to1. - Since there is a monotonous background influence on the input image, increase the CFG Scale to
10to increase the influence of the prompt.
Finally, generate it with the “Generate” button and you are done.
Example of Batch mode usage
Batch mode is used when you want to apply img2img to multiple images at once. It is not very effective, but it can be used when you want to apply a style to a group of images.
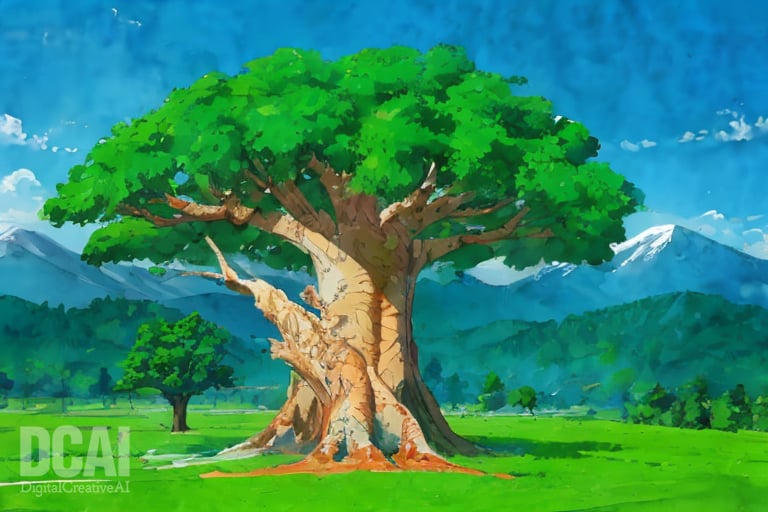
This time, let’s convert the three images generated in the previous example into a watercolor-style sketch. However, this usage is not very efficient because it is not possible to modify each image one by one.
The following image created in the previous examples is loaded into the input.


Enter the prompt as follows.
(water color, sketch:1.5), flat color, masterpiece, ultra detailedPaste the following prompt into the negative prompt.
worst quality, low quality, normal quality, lowresChange the following parameters.
- Change the Sampling method to
DDIM CFG++, which is compatible with img2img, and the Schedule type toDDIM. *If not listed, A1111 WebUI must be updated to v1.10 or higher. - Since we want to generate the image in equal size, we switch from Resize to to
Resize byand set Scale to1. - We want the prompt to take precedence, so we set CFG to
9. - We want to preserve as many elements of the input image as possible, so we set the denoising strength to
0.3.
Finally, generate it with the “Generate” button and you are done.
Conclusion
Have you had a chance to learn about the basic usage of A1111 Stable Diffusion Web UI’s “Image to Image (img2img)”? The img2img feature is very useful for brushing up existing artwork with AI, creating professional looking illustrations from simple sketches, and fine-tuning generated images. It is a useful tool to make your creative work more efficient, so please give it a try.
Thank you for reading to the end.
If you found this even a little helpful, please support by giving it a “Like”!